 Save to Pinterest
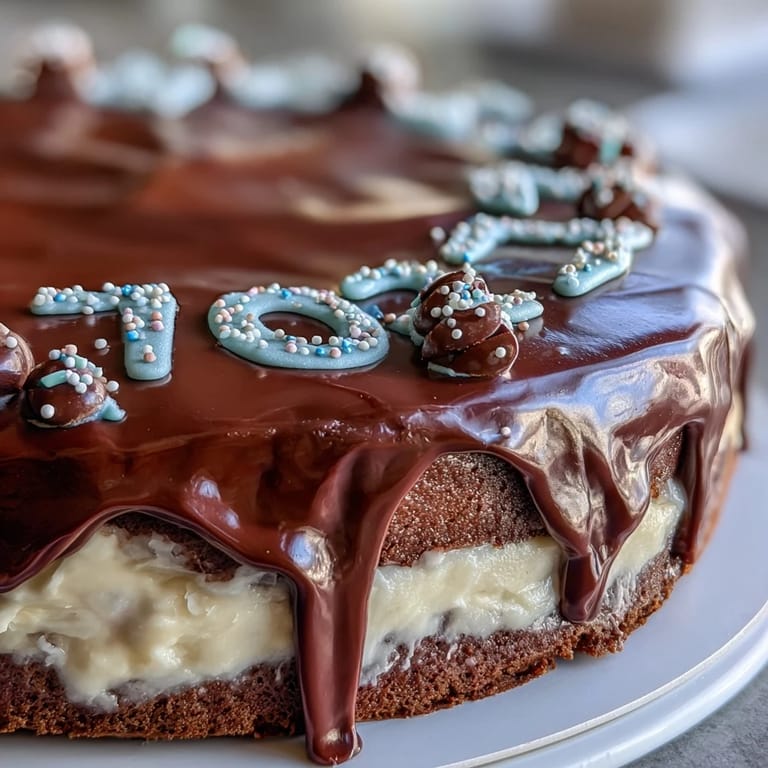
 There's something about baking a sheet cake for someone's milestone moment that transforms a simple dessert into a memory. My neighbor stopped by my kitchen last spring, clutching an invitation to her daughter's graduation party, and asked if I could whip up something celebratory. I'd made countless cakes before, but this time felt different—the cake needed to be foolproof, gorgeous, and finish in time for the party. That afternoon, as vanilla scent filled the house and I carefully piped the Class of 2026 onto buttercream, I realized this wasn't just dessert; it was edible joy.
I'll never forget the look on that graduate's face when she saw her cake at the party—the way she laughed at the slightly wobbly piping and immediately cut a slice. Her friends crowded around, and suddenly this cake became the centerpiece of celebration, not just something pretty on a table. That's when I knew this recipe was worth perfecting and sharing.
Ingredients
- All-purpose flour (2 ½ cups): The foundation of tender crumb; whisk it with the leavening agents to avoid dense pockets.
- Baking powder (2 ½ tsp): This is your lift—don't skip it or reduce it, as it's essential for that fluffy, cloud-like texture.
- Salt (½ tsp): A tiny pinch that makes the vanilla sing and balances sweetness without tasting salty.
- Unsalted butter (1 cup for cake, 1 cup for frosting): Room temperature is non-negotiable; cold butter won't cream properly and will leave you with a dense cake.
- Granulated sugar (1 ¾ cups): Beat it with butter until genuinely fluffy and pale—this takes three full minutes and makes a noticeable difference in texture.
- Eggs (4 large): Room temperature eggs incorporate smoothly; cold ones can cause the batter to break or become lumpy.
- Vanilla extract (1 tbsp for cake, 2 tsp for frosting): Pure vanilla creates depth; extract does lift the flavor noticeably above imitation.
- Whole milk (1 cup for cake, ¼ cup for frosting): At room temperature, it blends seamlessly into the batter and creates a tender crumb.
- Powdered sugar (4 cups, sifted): Sifting removes lumps that would otherwise show in smooth frosting; this step feels small but prevents grainy texture.
- Food coloring: Gel coloring works better than liquid if you're tinting large portions; it won't thin out your frosting.
Tired of Takeout? 🥡
Get 10 meals you can make faster than delivery arrives. Seriously.
One email. No spam. Unsubscribe anytime.
Instructions
- Prepare your pan and oven:
- Preheat to 350°F and grease your 9x13-inch pan generously, then line it with parchment paper for easy release. This step takes two minutes and saves your cake from sticking to edges.
- Mix dry ingredients:
- Whisk flour, baking powder, and salt together in a medium bowl—this distributes the leavening evenly so you won't end up with peaked or sunken spots. Don't overthink it; just make sure everything is combined.
- Cream butter and sugar:
- Beat them together for three full minutes until the mixture looks pale and fluffy, like thick frosting. This is where air gets incorporated, and it makes or breaks your cake's texture.
- Add eggs and vanilla:
- Drop in one egg at a time, beating well after each addition, then mix in the vanilla extract. Each egg needs a moment to fully incorporate before the next arrives.
- Alternate dry and wet ingredients:
- Start with flour, add a third of the dry mixture and beat until just combined, then add a third of the milk, repeat, ending with flour. This alternating method keeps the batter smooth without overworking it.
- Pour and bake:
- Spread batter evenly in your prepared pan and smooth the top with a spatula. Bake for 30 to 35 minutes until a toothpick inserted in the center comes out clean or with just a few crumbs clinging to it.
- Cool completely:
- Let the cake cool in the pan on a wire rack for at least an hour; this prevents frosting from melting into warm cake. Patience here pays off in a perfectly frosted top.
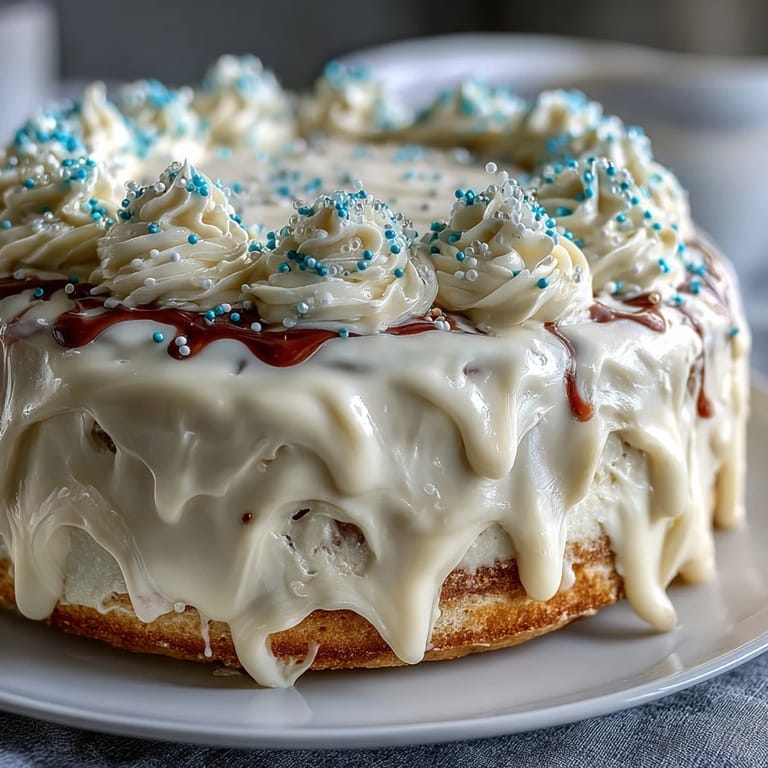
- Make buttercream frosting:
- Beat softened butter until creamy, then gradually add sifted powdered sugar, milk, vanilla, and salt, beating for three to five minutes until fluffy and light. The gradual addition of sugar prevents lumps and aerates the frosting.
- Tint and frost:
- Divide frosting into portions and add food coloring if desired, then spread an even layer over the cooled cake. Use an offset spatula or the back of a spoon for a smooth finish.
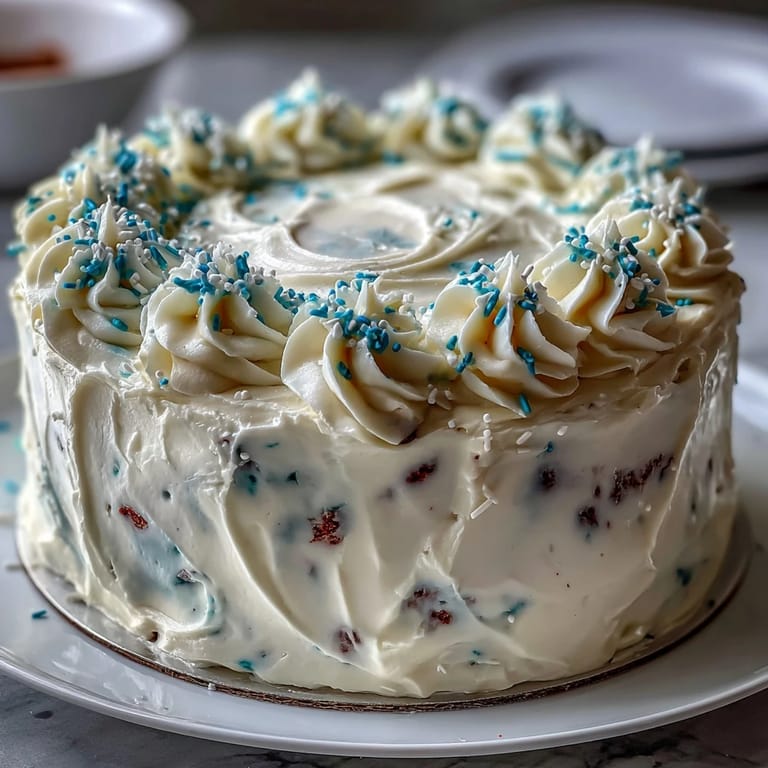
- Pipe your celebration message:
- Transfer tinted frosting to a piping bag with a small round tip and carefully pipe Class of 2026 or whatever message fits the moment. Steady pressure and slow movements create cleaner lines than rushing.
- Add final touches:
- Scatter sprinkles or edible decorations around your piping if desired. Step back and admire your work—it's meant to look homemade and joyful, not bakery-perfect.
 Save to Pinterest
 Baking this cake has taught me that the most memorable desserts aren't always the most complicated—they're the ones made with intention and shared with people who matter. Every time I frost a sheet cake now, I think about that graduation party and how something so simple became part of someone's happy story.
Why This Cake Works for Celebrations
Sheet cakes are the unsung heroes of party planning because they feed a crowd without requiring special pans or techniques. This vanilla base is neutral enough to pair with any occasion but refined enough to feel intentional and thoughtful. The buttercream stays soft enough to enjoy at room temperature, so guests can grab a slice whenever hunger strikes, and the cake tastes even better the next day as flavors settle and meld together.
Making It Personal with Decorations
The piping step is where you inject personality into this cake, and it's more forgiving than you might imagine. Shaky letters still read as genuine and homemade; perfection matters far less than effort and meaning. Consider adding sprinkles in school colors, edible flowers, or even a simple border of rosettes to frame your message—whatever feels right for the person being celebrated.
Storage and Make-Ahead Strategy
This cake rewards advance planning because you can bake it a day or two before an event, wrap it unfrosted, and decorate it fresh on party day. The buttercream frosting stays silky at room temperature for up to two hours, which means you can apply it and pipe your message a few hours before guests arrive. If you need to store it longer, cover the frosted cake loosely with plastic wrap and refrigerate for up to five days; just let it sit at room temperature for 30 minutes before serving so the crumb softens and flavors brighten.
- Unfrosted cake wrapped in plastic stays fresh and moist for two days at room temperature or up to a week frozen.
- Frosted cake covered at room temperature lasts two days; in the refrigerator, it keeps for five days without losing quality.
- If baking far ahead, freeze the unfrosted cake in its pan, then transfer it to a freezer bag once solid—thaw at room temperature before frosting.
 Save to Pinterest
 This cake has become my go-to for marking milestones because it never disappoints and always feels celebratory without pretense. Whether it's a graduation, promotion, or simply someone's birthday, a homemade sheet cake says you showed up and cared enough to bake.
Frequently Asked Questions
- → What makes the cake moist?
Using softened butter, whole milk, and carefully balanced ingredients ensures the cake stays moist and tender.
- → How is the buttercream tinted and piped?
Buttercream is whipped until fluffy, divided into portions, and food coloring is added before piping celebratory text and designs on top.
- → Can I customize the decoration colors?
Yes, food coloring can match school colors, and sprinkles or edible decorations add a personal festive touch.
- → How long does the cake stay fresh?
Store at room temperature covered for up to 2 days or refrigerate to keep fresh for up to 5 days.
- → Are substitutions for dietary needs possible?
Yes, non-dairy milk can be used for a dairy-free variation; ensure all other ingredients comply with dietary requirements.