 Save to Pinterest
 My friend texted me three days before her daughter's graduation asking if I could bake something festive for the backyard party. I was in the grocery store when she called, stressed about what would hold up in the heat and actually look celebratory without requiring last-minute decorating skills I don't possess. These cookie bars became my answer—they're sturdy enough to transport, impressive enough to feel special, and forgiving enough that I could make them the night before without anxiety.
Standing in that backyard watching people load up plates with these bars, I noticed the college-bound grad gravitating back for seconds. Her mom caught my eye and smiled—it wasn't about the dessert being perfect, it was about showing up with something made by hand that tasted like celebration. That's when I realized these bars had become less about the recipe and more about the moment.
Ingredients
- All-purpose flour (2 1/4 cups): The foundation that keeps these bars chewy rather than cakey; don't sift it unless you love dense bars.
- Baking soda (1 tsp): This is your secret to that slightly caramelized edge and tender crumb.
- Salt (1/2 tsp): Makes every bite taste more like chocolate and less like sugar, trust me on this.
- Unsalted butter, melted (1 cup): Melting it first creates a richer flavor and smoother dough than cold butter would.
- Brown sugar (1 cup packed): The molasses in brown sugar adds moisture and a subtle depth that's easy to overlook but you'll absolutely taste it.
- Granulated sugar (1/2 cup): This balances the brown sugar and creates that slightly crispy outer edge.
- Eggs (2 large): Room temperature eggs incorporate more smoothly, though I've never waited for them to warm up and they've turned out fine.
- Pure vanilla extract (2 tsp): Don't skip the real stuff; imitation will taste noticeably thin compared to the richness of everything else.
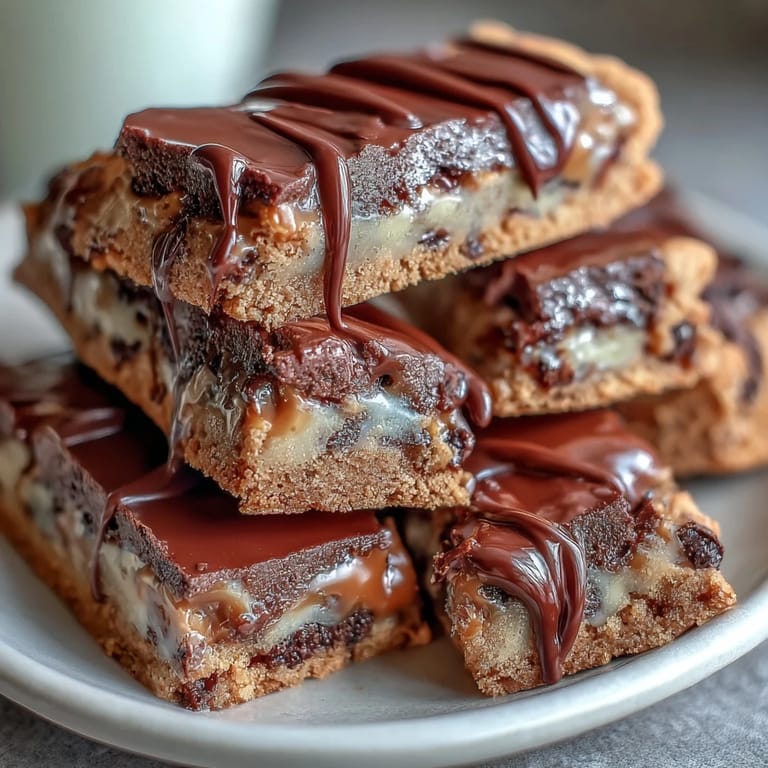
- Semi-sweet chocolate chips (1 cup): Scattered throughout, they're your reliable chocolate presence.
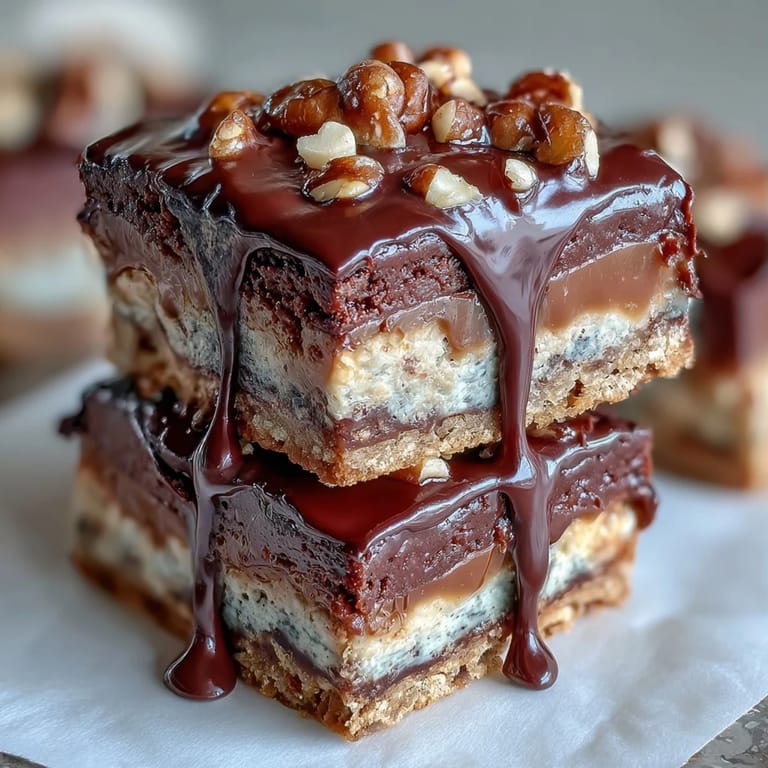
- Colored candy-coated chocolates (1/2 cup): The star of the show visually; use whatever brand matches your school colors perfectly.
- White chocolate (4 oz chopped or chips): The drizzle that makes these feel dressed up; cheaper brands melt more predictably than premium ones.
- Vegetable oil (1 tsp): This keeps the white chocolate fluid and pourable instead of thick and clumpy.
Tired of Takeout? 🥡
Get 10 meals you can make faster than delivery arrives. Seriously.
One email. No spam. Unsubscribe anytime.
Instructions
- Get your pan ready:
- Preheat your oven to 350°F and line that 9x13-inch pan with parchment paper, leaving extra hanging over the sides so you can pull the whole thing out later without wrestling with hot bars. This is the single move that makes everything easier.
- Mix your dry team:
- Whisk together flour, baking soda, and salt in a medium bowl and set it aside. This prevents lumps of baking soda hidden in your final dough later.
- Blend the wet ingredients:
- In your large bowl, whisk together the melted butter and both sugars until they look smooth and combined. Add your eggs and vanilla, mixing until everything is well incorporated and the mixture looks pale and slightly fluffy.
- Bring it together gently:
- Gradually fold the dry ingredients into the wet mixture, stopping as soon as you don't see streaks of flour anymore. Overmixing here creates dense bars, and we want chewy, not heavy.
- Add the celebration:
- Stir in your chocolate chips and colored candies, being gentle so you don't crush the colored ones.
- Spread and bake:
- Pour the dough into your prepared pan and spread it evenly into the corners. Bake for 23 to 25 minutes, watching until the edges are lightly golden and a toothpick inserted in the center comes out mostly clean with maybe a few moist crumbs.
- Let it cool completely:
- This step requires patience but it's crucial; warm bars will crumble when you drizzle, and nobody wants that. Cool them fully in the pan on a wire rack.
- Melt the white chocolate magic:
- In a microwave-safe bowl, combine your chopped white chocolate and vegetable oil, microwaving in 20-second bursts and stirring between each one until completely smooth. The oil prevents seizing and keeps the chocolate fluid.
- Drizzle with confidence:
- Once the bars are completely cool, drizzle the white chocolate over the top using a spoon or piping bag in whatever pattern feels right. Add sprinkles immediately while it's still wet if you're using them.
- Set and cut:
- Let the drizzle harden completely before lifting the bars out using that parchment overhang, then cut into 16 squares with a sharp knife.
 Save to Pinterest
 My neighbor asked for the recipe after the graduation party and ended up making these for her son's college send-off dinner. She texted me a photo of her kitchen covered in white chocolate drizzle, laughing that she'd somehow gotten more on herself than on the bars, but they looked perfect anyway. These bars have a way of becoming part of people's celebration rituals, and that's the real magic.
Customizing Your Bars for Any Occasion
The beauty of this recipe is how easily it bends to whatever you're celebrating. I've made them for a library fundraiser using the library's colors, for a sports banquet in team colors, and once even in sunset oranges and pinks for a retirement party that happened to be in June. The colored candies are your most visible customization tool, but you can also play with the chocolate chips—dark chocolate instead of semi-sweet for a more sophisticated crowd, or milk chocolate if you're feeding younger kids.
Storage and Make-Ahead Strategy
These bars actually improve slightly overnight as the flavors settle together, so I've started baking them a full day ahead whenever possible. They keep at room temperature in an airtight container for up to four days, which means you can make them for a weekend party on Thursday evening without any stress. I once forgot about a batch in a closed container for five days and they were still completely fine, just slightly softer, which was honestly not a bad development.
Variations and Flavor Swaps
I've experimented with these bars more than I probably should admit, adding everything from crushed pretzels for a salty contrast to a drizzle of dark chocolate alongside the white chocolate for visual drama. The base recipe is flexible enough to handle small tweaks without falling apart. You could swap the colored candies for mini marshmallows, use peanut butter chips mixed in with the chocolate, or even add a layer of salted caramel between the baked bar and the white chocolate topping if you're feeling ambitious.
- Try mixing in a teaspoon of almond extract alongside the vanilla for a subtle flavor depth.
- Pulse some crushed pretzels or toffee bits into the dough if you want texture contrast.
- Make these ahead and wrap individual bars in clear cellophane tied with a ribbon for elegant party favors.
 Save to Pinterest
 These cookie bars have become my go-to celebration dessert because they feel special without demanding perfection. Everyone deserves to mark their milestones with something made by hand, and these bars make that moment accessible even on the busiest days.
Frequently Asked Questions
- → Can I substitute the candy-coated chocolates with other ingredients?
Yes, you can replace candy-coated chocolates with chopped nuts, dried fruits, or more chocolate chips to customize flavor and texture.
- → How do I melt the white chocolate without burning it?
Melt white chocolate in short, 20-second bursts in a microwave, stirring between intervals until smooth to avoid scorching.
- → What is the best way to ensure chewy bars?
Avoid overmixing the batter and carefully time baking until edges are lightly golden to maintain chewiness.
- → Can these bars be made ahead of time?
Yes, they keep well stored in an airtight container at room temperature for up to 4 days.
- → Is it necessary to use parchment paper in the pan?
Parchment paper helps with easy removal and clean edges, making slicing and serving simpler.