 Save to Pinterest
 My neighbor brought over a bag of guavas one sticky afternoon, insisting I had to do something with them before they turned. I'd never made jelly before, only eaten it, and the whole process felt intimidatingly precise. But there was something magnetic about watching those pink-fleshed fruits transform into liquid ruby, something that made me understand why people get obsessed with preserving.
I remember my sister laughing when I checked the thermometer for the hundredth time that day, convinced I'd miss the gel stage and end up with either syrup or rubber. When that first jar set properly, when I heard the lids pop and seal, I felt like I'd cracked some ancient code. She got three jars that Christmas, and honestly, I think they mattered more than anything else I wrapped.
Ingredients
- Ripe guavas (1.5 kg, about 3.3 lbs): Choose fruit that yields slightly to pressure and smells fragrant, not the rock-hard ones; the pink or white flesh inside should be dotted with small seeds and feel heavy for its size.
- Water (4 cups): This becomes your extraction medium, pulling out pectin and flavor from the fruit's flesh and skin.
- Granulated sugar (4 cups): The ratio matters here—one cup per cup of extracted juice is your north star, though you can reduce slightly if you prefer less sweet preserves.
- Lemon juice (2 tbsp): This brightens the flavor and helps activate the natural pectin that makes your jelly set, creating that slight tang underneath the sweetness.
Tired of Takeout? 🥡
Get 10 meals you can make faster than delivery arrives. Seriously.
One email. No spam. Unsubscribe anytime.
Instructions
- Prepare your fruit:
- Wash each guava under cool water, then quarter them without peeling—those skins hold pectin and color. You want to hear the knife hitting the seeds, feel the slight resistance of ripe flesh.
- Create the base:
- Toss your fruit into a large saucepan with water and bring it to a rolling boil, then drop the heat to medium. Let it bubble away for about thirty minutes until every piece softens completely and the liquid takes on a pale pink hue.
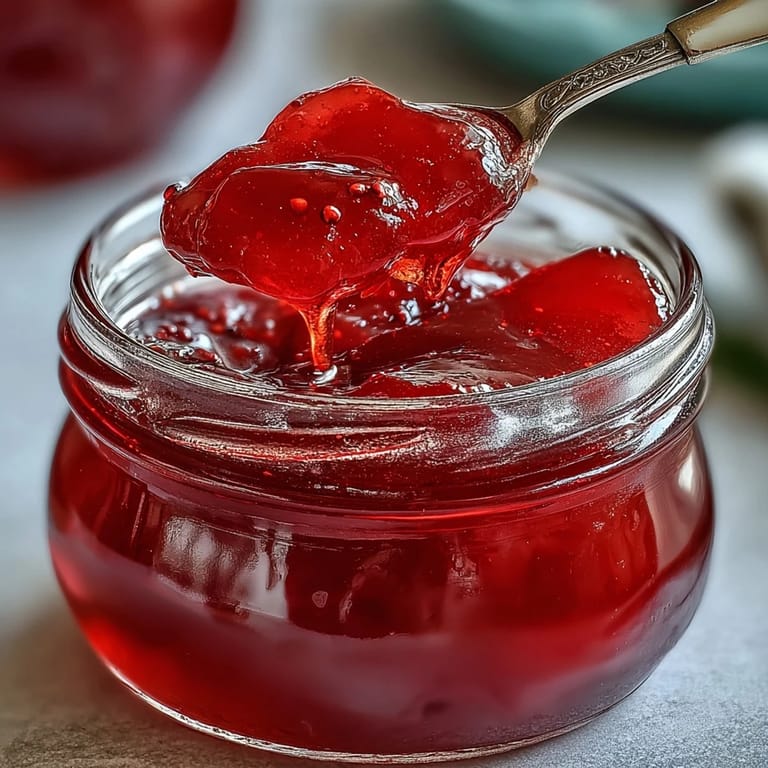
- Extract the juice:
- This is where patience becomes your greatest ingredient—line your strainer with cheesecloth and pour everything through, then let gravity do the work for at least two hours, even overnight if you can manage it. Don't squeeze or press; clear jelly comes from restraint.
- Measure and combine:
- Whatever juice drips out becomes your base; measure it carefully and use equal parts sugar, then add the lemon juice and stir until the sugar dissolves completely into the liquid.
- Reach the gel stage:
- Turn heat to high and let the mixture roll at a rapid boil, watching your thermometer climb toward 220°F, which should take fifteen to twenty minutes. Skim off the foam that rises to the surface as you go—this keeps the finish crystal clear.
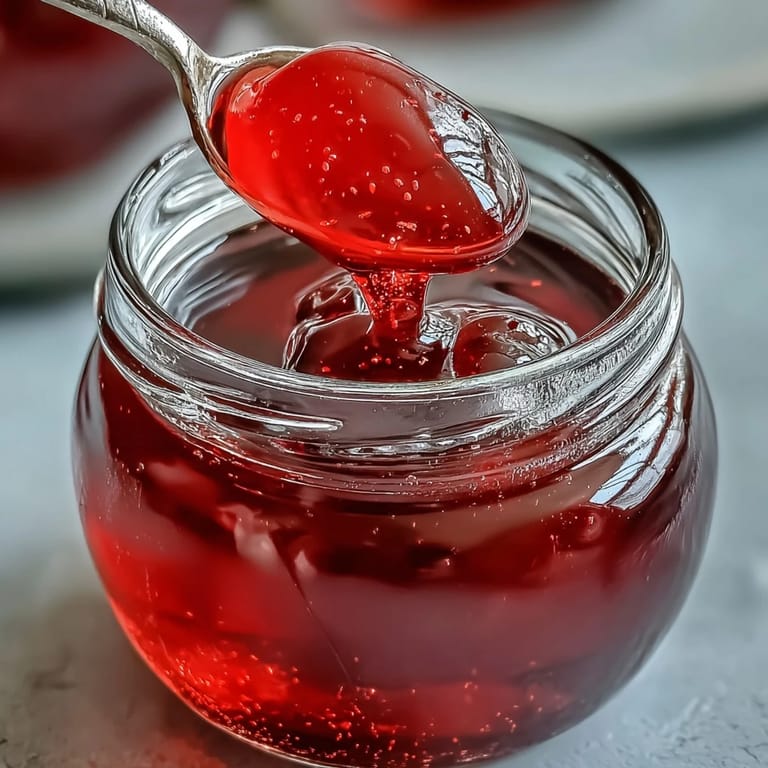
- Test for doneness:
- Drop a spoonful onto a cold plate and let it cool for a minute, then push it with your finger; if it wrinkles and doesn't flow back, you've reached the moment of perfection.
- Seal and rest:
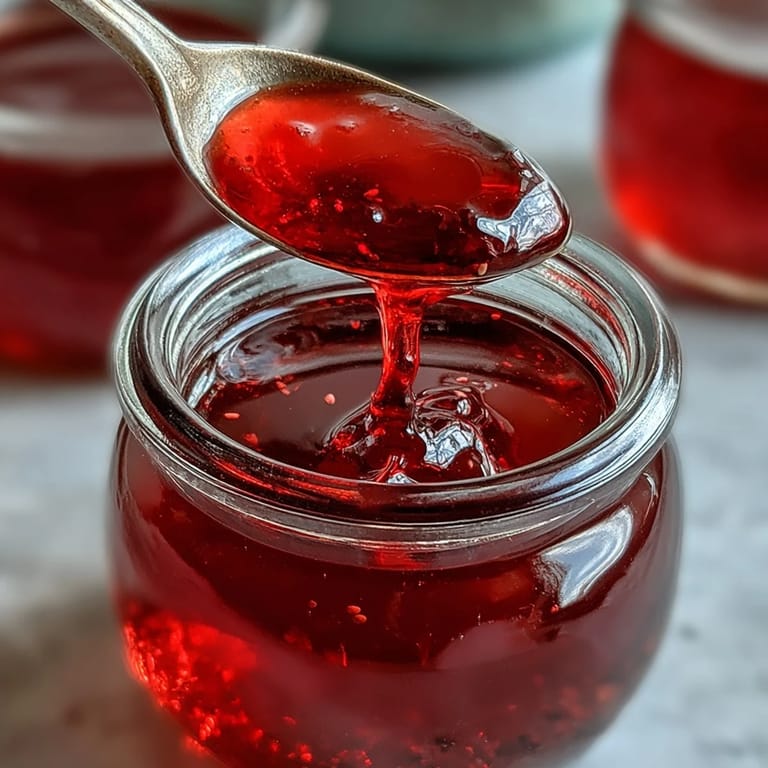
- Pour the hot jelly into sterilized jars leaving a quarter inch of space at the top, seal immediately, and listen for that satisfying pop as each jar cools and the lids lock tight.
 Save to Pinterest
 I gave a jar to my mother, and she called me the next morning to report that my niece had eaten it straight from the spoon at breakfast, declaring it better than any store-bought version. That moment—knowing something I'd made by hand had made someone's ordinary morning feel a little more luxurious—that's when I understood why people keep coming back to the kitchen.
The Magic of Guava
Guavas aren't as fussy as they seem once you understand what they're telling you. The fruit that smells almost floral, the one that gives just slightly when you squeeze it, that's your sign. I learned this through buying too many hard ones and watching them sit on my counter for days, so now I shop with my nose first and my hands second.
Timing and Temperature Matter
A candy thermometer stopped being optional once I realized how narrow the window is between perfect gel and overcooked paste. The thermometer removes the guesswork, which sounds clinical until you realize how freeing it actually is. When you know exactly what 220°F feels like, what it looks like in the pot, you start trusting yourself more in other areas of cooking too.
Storing Your Treasure
Those sealed jars sitting in your pantry are more durable than they look, capable of keeping for months in a cool, dark corner, waiting for the moment you need them. Once opened, though, the refrigerator becomes their home, and three weeks is your window before the quality shifts.
- Use opened jars for spreading on toast, swirling into yogurt, or thumbprint cookie centers where they'll be consumed quickly.
- Keep unopened jars somewhere cool and dark, away from direct light which can fade that beautiful color over time.
- Label them with the date you made them so you don't wonder six months from now when you actually made this.
 Save to Pinterest
 This jelly becomes whatever you need it to be: a glaze that catches light on top of a cake, a filling that surprises you in the middle of a cookie, or simply something beautiful and homemade to give away. That's the real reward.
Frequently Asked Questions
- → How long does homemade guava jelly last?
Properly sealed and stored in a cool, dark place, unopened jars will keep for up to one year. Once opened, refrigerate and use within three weeks for best quality and flavor.
- → Why should I avoid pressing the fruit when straining?
Pressing or squeezing the fruit pulp during straining releases cloudiness into the juice. Letting it drip naturally through cheesecloth produces the clear, jewel-toned appearance that makes this preserve so visually appealing.
- → What's the best way to test if the jelly is done?
Use the cold plate test: place a small spoonful of hot jelly on a chilled plate and let it sit for a minute. Push the edge with your finger—if it wrinkles and holds its shape, it has reached the proper gel stage and is ready to jar.
- → Can I use underripe guavas?
Yes, actually using slightly underripe guavas is beneficial because they contain more natural pectin. This helps your jelly set properly without needing to add commercial pectin or extra gelling agents.
- → What can I use guava jelly for besides spreading on toast?
This versatile preserve works wonderfully as a filling for thumbprint cookies, a glaze for sponge cakes, a topping for cheesecake, or swirled into yogurt. It also pairs beautifully with soft cheeses on a charcuterie board.