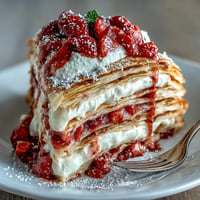
 Save to Pinterest
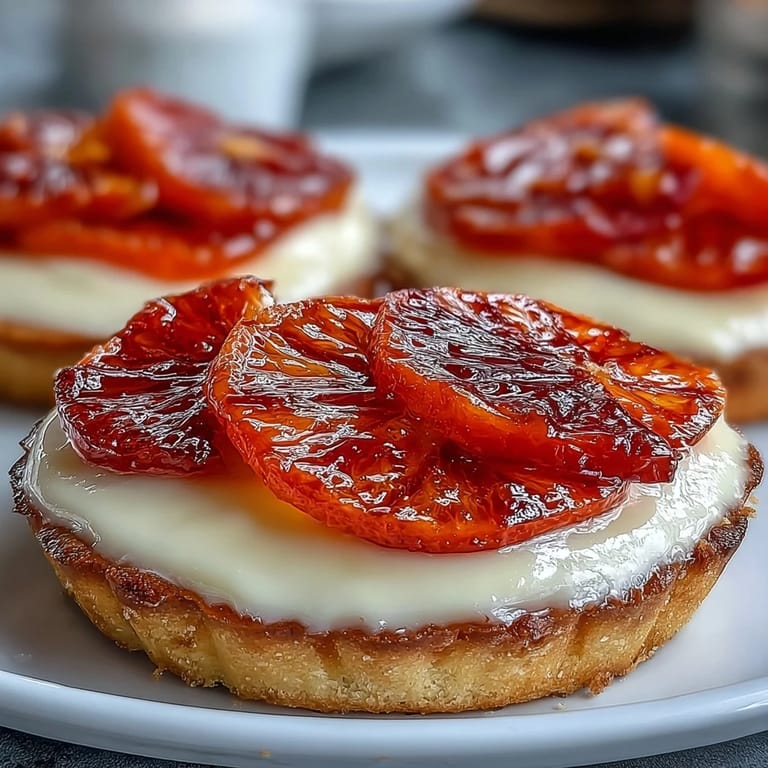
 The first blood oranges of winter always catch me off guard. I was sorting through citrus at the farmers market one gray February morning when I sliced one open and the jewel-toned flesh practically glowed against the cutting board. That afternoon, I made these tarts for the first time, mostly because I couldn't stop staring at how beautiful those oranges were. They've been my quiet showstopper ever since.
I brought a tray of these to a dinner party once, and my friend Sarah insisted they were too pretty to eat. We ate them anyway, of course, but not before she took about fifteen photos. The custard had set perfectly, the shells were golden and buttery, and the oranges looked like stained glass. It was one of those nights where dessert actually stopped conversation for a moment.
Ingredients
- All-purpose flour: The backbone of your tart shell, and using cold butter with it creates those flaky, tender layers you want.
- Powdered sugar: Sweeter and finer than granulated, it melts into the dough and gives you a more delicate crumb.
- Unsalted butter, cold and cubed: Cold is non-negotiable here, warm butter makes tough dough, and I learned that the hard way on a summer afternoon.
- Egg yolk: Adds richness and helps bind the dough without making it chewy.
- Ice water: Just enough to bring everything together, add it slowly or you'll end up with sticky dough.
- Salt: A pinch sharpens the sweetness and makes everything taste more like itself.
- Whole milk: The custard base, and whole milk is worth it for the creaminess you can't fake with lower fat versions.
- Granulated sugar: Sweetens the custard and helps it set when combined with the cornstarch.
- Egg yolks: These make the custard velvety and rich, the more yolks the silkier it gets.
- Cornstarch: Your thickening agent, it sets the custard without the eggy heaviness of flour.
- Pure vanilla extract: I use the real stuff here because you can actually taste it against the citrus.
- Butter (for custard): Stirred in at the end, it gives the custard a glossy finish and a little extra luxury.
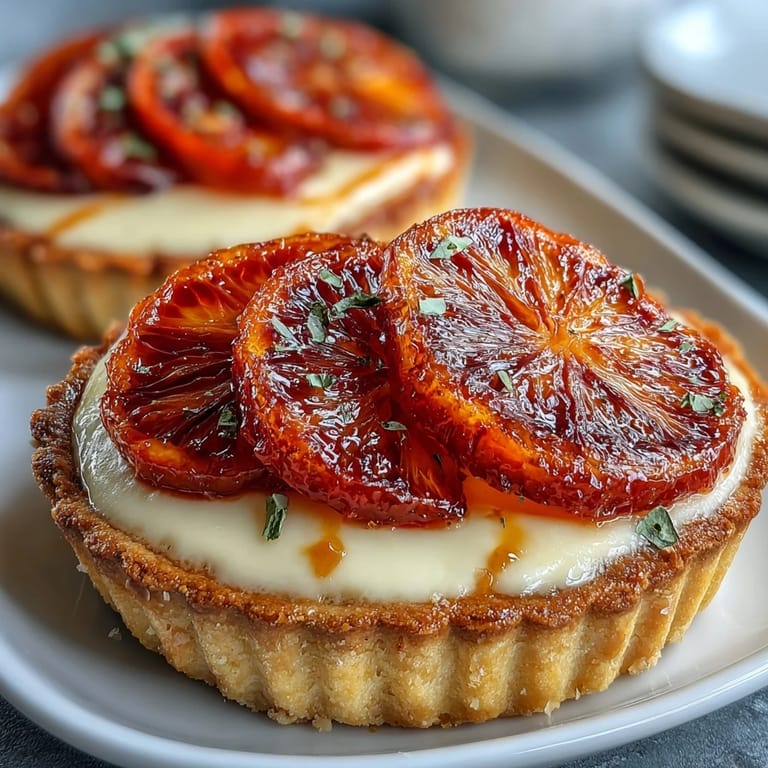
- Blood oranges: The star, with their ruby color and slightly bitter edge that cuts through all that sweetness.
- Honey: Optional, but a thin glaze makes the fruit shine and adds a floral note.
Tired of Takeout? 🥡
Get 10 meals you can make faster than delivery arrives. Seriously.
One email. No spam. Unsubscribe anytime.
Instructions
- Make the tart dough:
- Pulse your flour, powdered sugar, and salt in the food processor, then add those cold butter cubes and pulse until it looks like coarse sand. Add the egg yolk and drizzle in ice water a tablespoon at a time until the dough just starts to clump together, don't overwork it or it'll get tough.
- Chill the dough:
- Shape it into a flat disk, wrap it tightly in plastic, and let it rest in the fridge for at least an hour. This relaxes the gluten and makes rolling so much easier.
- Roll and fit the shells:
- On a floured surface, roll the dough to about 1/8-inch thick, then cut circles large enough to fit your tart pans with a little overhang. Press gently into the pans, trim the edges, and chill again for 20 minutes so they hold their shape when baked.
- Blind bake the shells:
- Preheat your oven to 350°F, line each shell with parchment, and fill with pie weights or dried beans. Bake for 15 minutes, then remove the weights and parchment and bake another 5 minutes until golden and crisp.
- Cook the custard:
- Heat your milk in a saucepan until it's steaming, then whisk together egg yolks, sugar, and cornstarch in a bowl until smooth and pale. Slowly pour the hot milk into the yolk mixture while whisking, then return everything to the pan and cook over medium heat, whisking constantly, until it thickens and bubbles.
- Finish and cool the custard:
- Pull the pan off the heat, stir in vanilla and butter until smooth, then transfer to a bowl and press plastic wrap directly onto the surface to prevent a skin. Let it cool to room temperature, then chill for at least an hour.
- Assemble the tarts:
- Spoon the chilled custard into your cooled tart shells, smoothing the tops gently. Arrange thin slices of blood orange on top in overlapping circles, they should look like little citrus roses.
- Glaze and chill:
- If you want that glossy finish, warm honey and a teaspoon of water together and brush it lightly over the oranges. Chill the tarts until you're ready to serve, they hold beautifully for a few hours.
 Save to Pinterest
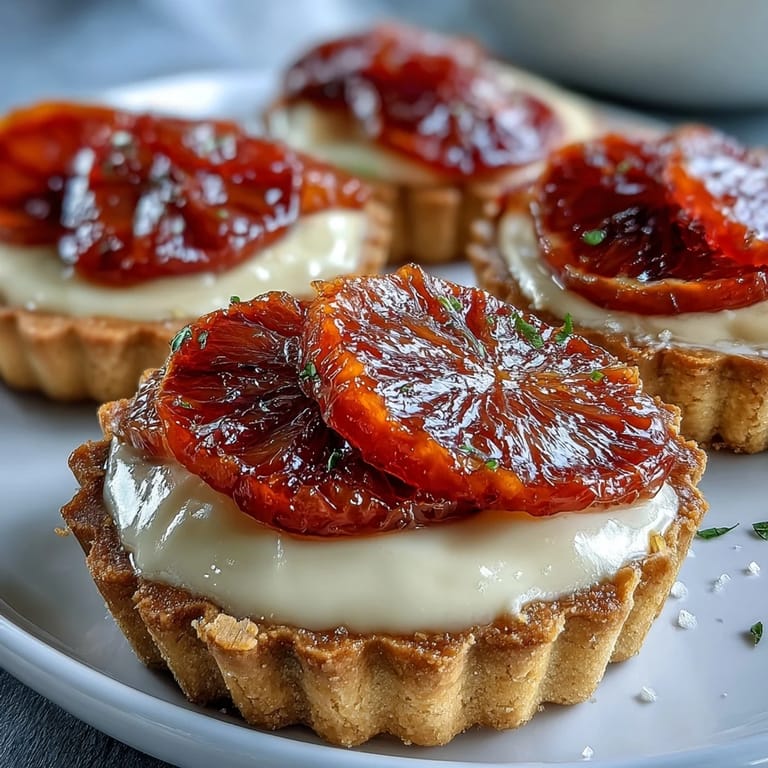
 There's something about pulling these out of the fridge and seeing all that color that makes me feel like I actually know what I'm doing in the kitchen. My neighbor once asked if I'd ordered them from a bakery. I didn't correct her right away.
Choosing Your Blood Oranges
Look for fruit that feels heavy for its size, that means it's juicy. The skin doesn't always show the deep red color inside, so don't judge by the peel alone. I've found the best ones at farmers markets in late winter, but grocery stores usually carry them January through March. If you can't find blood oranges, regular navels or Cara Caras work fine, you'll just lose that dramatic burgundy hue.
Make-Ahead Magic
The tart shells can be baked up to two days ahead and stored in an airtight container at room temperature. The custard keeps in the fridge for up to three days, just give it a good whisk before using. I like to assemble these the morning of serving, that way the shells stay crisp and the fruit looks fresh. If you glaze the oranges, do it just before serving or the honey can make things a little weepy.
Serving and Storing
These tarts are best served chilled or at cool room temperature, the custard softens nicely after about 10 minutes out of the fridge. If you have leftovers, cover them loosely and keep them refrigerated, they'll hold for a day or two but the shells do lose some crispness. I've never had one last longer than that, they tend to disappear fast.
- A small offset spatula makes it easier to lift the tarts out of the pans without cracking the shells.
- If your custard looks too thick after chilling, whisk in a teaspoon of milk to loosen it up.
- Serve these with a tiny dollop of whipped cream or a few fresh mint leaves if you want to gild the lily.
 Save to Pinterest
 Every time I make these, I'm reminded that some recipes are worth the extra steps. They're beautiful, they're delicious, and they make winter feel a little less gray.
Frequently Asked Questions
- → Can I make these tarts ahead of time?
Yes, the tart shells and custard can be prepared a day in advance. Store the shells in an airtight container at room temperature and the custard covered in the refrigerator. Assemble with fresh blood oranges just before serving for the best texture and appearance.
- → What can I substitute for blood oranges?
Regular oranges, Cara Cara oranges, or even mandarins work beautifully. Blood oranges provide a stunning color and slightly more complex flavor, but any citrus will taste delicious with the vanilla custard.
- → How do I prevent the tart shells from shrinking?
Chilling the dough twice—once after mixing and again after pressing into the pans—helps prevent shrinkage. Also avoid stretching the dough when fitting it into the pans, and use pie weights during the initial baking stage.
- → Can I use store-bought tart shells?
Absolutely! Pre-made tart shells save time and still produce a delicious result. Simply prepare the custard and arrange the blood oranges on top for an easy yet impressive dessert.
- → How long will these tarts stay fresh?
Once assembled, the tarts are best enjoyed within 24 hours. The custard stays fresh for up to 3 days refrigerated, and unbaked tart dough can be frozen for up to 3 months for future use.
- → What's the best way to slice blood oranges for topping?
Use a sharp knife to cut off both ends of the orange, then carefully slice away the peel and white pith. Slice the oranges into thin rounds, about 1/4-inch thick, removing any seeds as you go.